Exploring CAOS
This is a little tour through CAOS, the operating system of the KC85 computers (CAOS means Cassette-Aided-Operating-System).
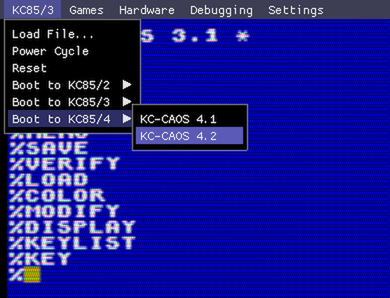
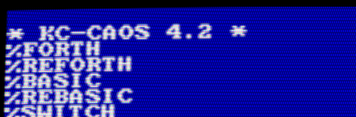
First, boot into the latest official CAOS version 4.2 from 1989 (toggle the debugging UI overlay by pressing the Tab key):
After about two seconds (yep, those little 8-bitters booted really fast), CAOS is displaying a list of available commands and is ready to accept input:
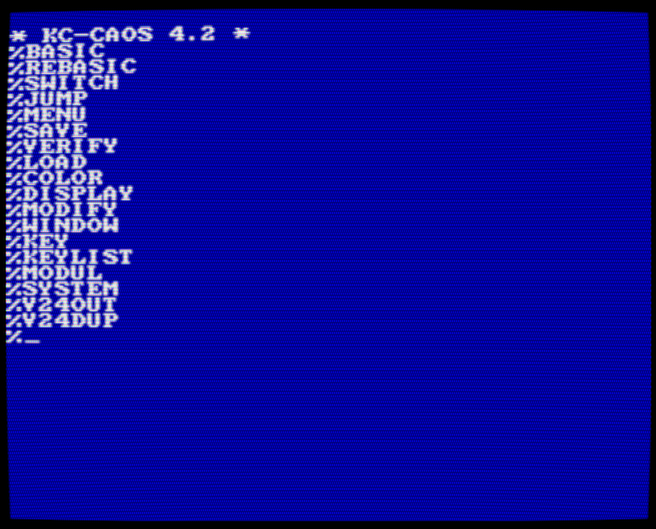
You can move the cursor freely around the screen using the [Arrow-keys].
[Enter] tries to parse whatever is on the current line as a command.
[Shift-Backspace] clears the screen.
The command MENU rebuilds the list of available commands.

Color and window management
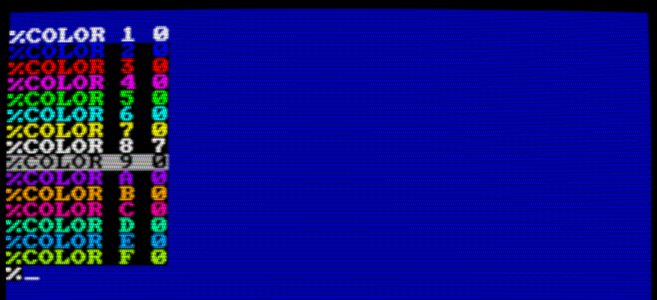
The COLOR command changes the foreground and background color, there are 15 foreground colors and 8 background colors to choose from. Note that all numbers are expected as hexadecimal. This is true for all CAOS commands:
The WINDOW command defines a rectangular window and assigns it an id, basically a very simple tmux-like terminal-session-manager. The WINDOW command takes 5 parameters that define the window rectangle and a window id:
WINDOW y h x w id
Where ‘x’ and ‘y’ are the coordinates of the top-left corner, and ‘w’ and ‘h’ are the window width and height. The max width of a window is 28 hex, and the max height is 20 hex. The ‘id’ is a number between 0 and 9. Once windows are defined, they can be activated with
WINDOW id
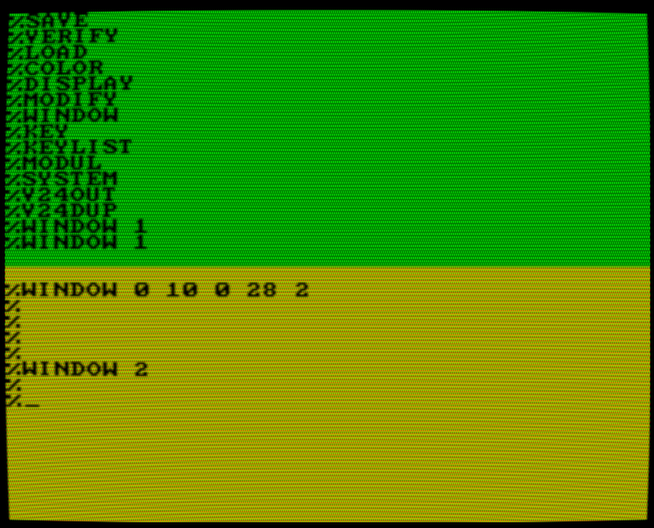
The following commands split the screen in half into two windows with different background colors (if you screw up, simply Reset the KC85/4 using the debugger menu).
[first press Shift-Backspace to clear the screen]
[then press Enter to get a prompt]

%WINDOW 10 10 0 28 1
%COLOR 0 6
[Shift-Backspace plus Enter to clear the new window]
%WINDOW 0 10 0 28 2
%COLOR 0 4
[Shift-Backspace plus Enter to clear the second window]
There should be 2 independent windows now which can be toggled with the commands WINDOW 1 and WINDOW 2:
Assigning function keys
Typing WINDOW 1 and WINDOW 2 to switch between windows is tedious, lets assign these commands to F1 and F2:
%KEY 1
WINDOW 1[Enter][Shift-Escape]
%KEY 2
WINDOW 2[Enter][Shift-Escape]
It should look like this:
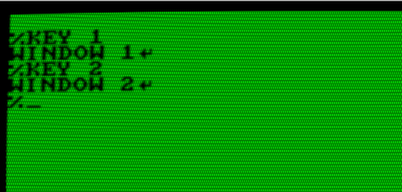
Pressing F1 and F2 will now switch between the 2 windows.
The command KEYLIST shows all current function key assignments:
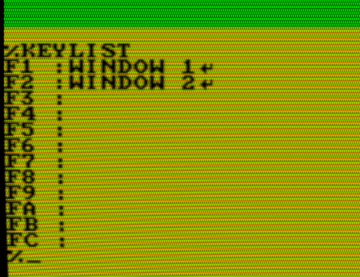
Switch back to the original window by typing WINDOW without any arguments, then type MENU to get the list of commands.
Viewing and editing memory contents
The command DISPLAY shows a hex-dump of the memory starting at aaaa with ss number of lines at a time and n columns:
DISPLAY aaaa [ss [n]]
For instance, to show the start of the pixel video memory:
%DISPLAY 8000 4
...
[Escape]
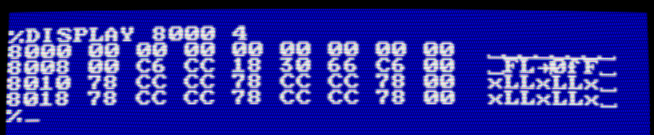
The DISPLAY command will wait for keyboard input. Hit [Escape] to go back to the command prompt.
The MODIFY command implements a simple hex-editor. Let’s mess up some video memory starting at address 8000: Type MODIFY 8000, and enter some hex-numbers, then press [Enter]. Enter a dot to go back to the command prompt:

Memory banks, expansion slots and modules
The commands SYSTEM, MODUL, JUMP and SWITCH control the hardware expansion system. Each KC85 has 2 expansion slots numbered 08 and 0C. Additional ‘bus-driver’ devices with 4 more expansion slots could be stacked on top of the base device.
The command SYSTEM gives an overview of the built-in memory banks:
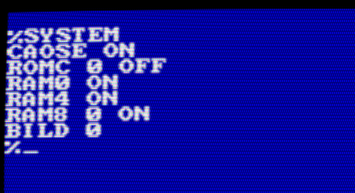
This means:
CAOSE ON:   the operating system ROM at address E000 is switched on
ROMC 0 OFF: both ROM banks at address C000 are switched off
RAM0 ON:    the built-in RAM at address 0000 is switched on
RAM4 ON:    the built-in RAM at address 4000 is switched on
RAM8 0 ON:  the first of the 2 RAM banks at address 8000 is switched on
BILD 0:     the first video memory area (out of 2) is displayed
The SWITCH command is used to control built-in memory banks and expansion modules:
SWITCH mm kk
mm is the module slot or memory bank id, and kk is a control byte.
The following ids are used for the built-in memory banks and the expansion slots of the base device:
RAM at address 0000:      mm = 00
video memory:             mm = 01
ROM banks:                mm = 02
RAM at address 8000:      mm = 03
RAM at address 4000:      mm = 04
right expansion slot:     mm = 08
left expansion slot:      mm = 0C
kk encodes the on/off state (bit 0), write protection (bit 1) and starting address (bits 4..7).
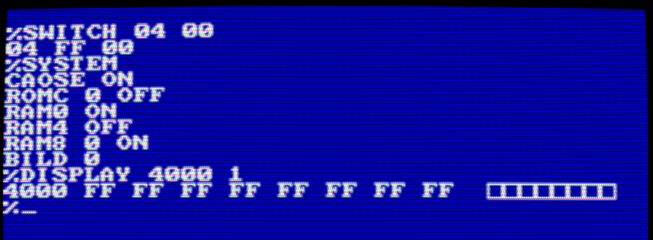
For instance to switch off the memory bank at address 4000:
%SWITCH 04 00
The SYSTEM command, and DISPLAYing the memory at address 4000 confirm that the memory is no longer mapped:
Switch it back on with:
%SWITCH 04 43
The SWITCH command is also used to control modules in expansion slots.
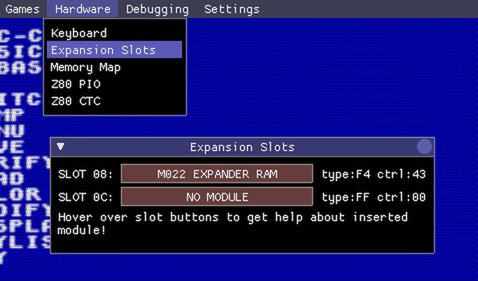
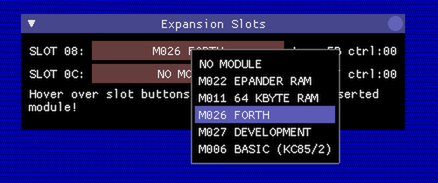
Insert the FORTH expansion module into slot 08 using the debugging UI (on a real KC85, you must only do this when the device is powered down!):
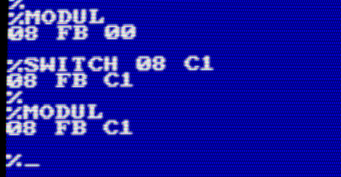
The FORTH module is now in expansion slot 08, as can be seen with the MODUL command, but it is not switched-on yet. To function properly, the module must be switched to address C000, this is achieved with the command SWITCH 08 C1 (08 means ‘expansion slot 08’, the ‘C’ in C1 means ‘at address C000, and the ‘1’ in C1 means: ‘active’). Another MODUL command confirms that the modul in slot 08 has the new control byte C1 (the FB is the module hardware identifier):
When displaying the MENU again, there are now 2 new commands called FORTH and REFORTH (at least when you’re on the KC85/4):
If you’re not seeing the two new menu entries, you’re on a KC85/3, where the BASIC ROM is blocking access to the FORTH module. In this case, the BASIC ROM must be switched off first with SWITCH 02 00.
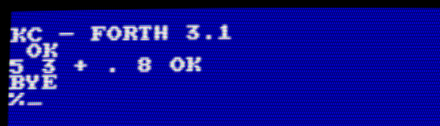
To give it a try, type FORTH, when done, return to the CAOS command prompt with BYE:
The remaining module management command JUMP is used to jump into an alternative operating system provided in a ROM module. In the emulator, this is currently only useful with the M006 BASIC ROM module for the KC85/2. How this works is left as an excersice to the reader ;)
Cassette loading/saving, and V24 control
Before you get excited, all the remaining commands don’t do anything useful in the emulator.
On a real KC85, the commands LOAD, SAVE and VERIFY are used to load and save data from and to cassettes, and verify a saved file.
In the emulator, LOAD and VERIFY will simply wait forever. For shitz’n’giggles you can try to save some data (make sure you have sound enabled):

It sounds cool, but the sound emulation isn’t precise enough that the save audio signal would be any useful.
The 2 remaining commands, V24OUT and V24DUP were used to control the V24-interface module. V.24 was (is?) a serial interface standard used to communicate between machines, modems and printers.